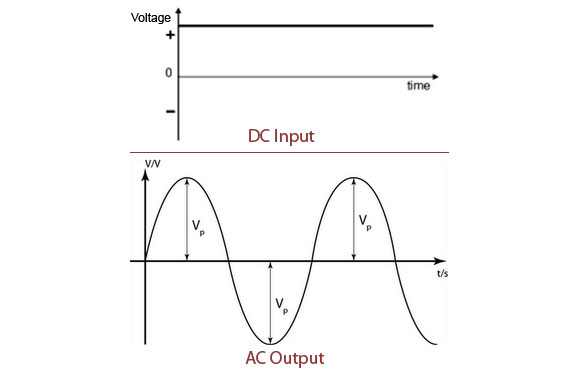
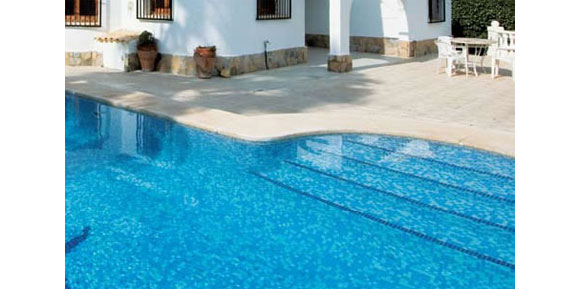
Whether fixed or portable, swimming pools can be found in the gardens of many houses throughout the world. Most people begin using their pool in the spring or beginning of summer. Although the air temperature may be pleasant enough, the temperature of the pool water is usually below desired levels at the beginning of the summer. To raise the temperature of the pool, solar heaters that use solar energy and grid tie heaters can be used.
The most important thing about solar heaters is that they are energy-saving and environment-friendly. These two terms are very important these days. The more we use renewable energy sources, the more we can help safeguard our planet's future.
There are two types of solar heaters: ones that are roof-attached and ones that are located pool side. The roof-attached solar heaters are the more commonly used.
Renewable Energy and Solar Swimming Pool Heaters
The use of renewable energy sources such as wind, solar and geothermic energy lessens the release of harmful gases in to the atmosphere and will help leave us a habitable world for future generations. Solar heaters for swimming pools may be a small solution to this problem, but they are a popular one nonetheless.
In the States, many houses with pools use this system. Thanks to this system, we can make use of the solar energy which is both cheap and clean. In this article we will try to inform you about the system's advantages in terms of energy-saving and how much we could save.
Solar Pool Heating System Parts
Solar Collector: We already mentioned about its basic function and how it works in a previous article. Briefly though, it is a component that provides the user with hot water by transferring the sunlight it absorbs to the water within it by means of a specific device. There are different sizes that can be used, depending on the size of the pool in question.
The solar collector is a device that converts the cold water it takes in into hot water; it has to different types of units: BTU and MJ.
Pump: It carries the cold water from the pool to the solar collector and carries warm water back to the pool. There many types of pumps in terms of performance, and they are chosen according to the amount of water that need circulating and the transfer rate. For larger swimming pools, pumps with greater power are obviously chosen. There are two ends to these pumps: the intake and outlet.
Filter: This helps the pool stay clean and prevents it from clogging the system by cleaning the debris before the pump takes the water to the collector. These filters should be cleaned regularly.
Check Valve (Wave): When the manual check valve is shut, the solar collectors heat the water in the swimming pool to the maximum temperature allowable and deactivate all the temperature check systems.
Flow Control Valve (Wave): The flow control valve is connected to a sensor which checks the temperature of the system and when the desired level is reached the solar panels prevent the swimming pool from getting hotter by stopping the water transfer. The check valve should always be open for this valve to function.
Sensor: This is the device that controls the Flow Control Valve in order to keep the pool temperature regulated as well as measuring the temperature on both the panels and pool.
How Solar Swimming Pool Heaters Work?
We talked about the different components and the roles they play above. Please see the picture below to understand how the system functions and how the parts are related to one another.
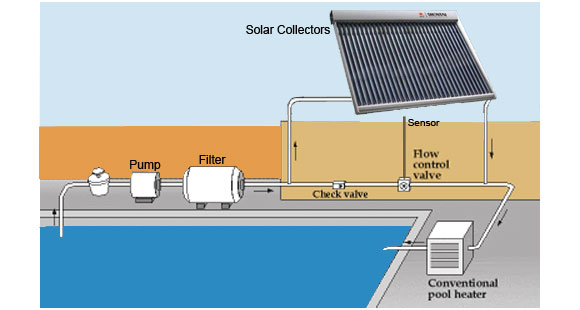
Let us detail the way the system functions:
1.) The solar collectors heat the water by using the sunlight. As mentioned before, the important aspect of this is transferring the heated water to the pool and taking the cool water to the collectors.
2.) The water taken from the pool by the pump is sent to the filter unit to eliminate debris.
3.) The cool water cleaned in the filter unit is directed to the solar collector by means of the pipes and simultaneously directed to a secondary pipe system which is also shunt to the collector unit. The role of the second pipe system is to protect the temperature of the pool.
4.) If the system is programmed to heat the pool, the secondary pipe system will be turned off for the water to pass through. So, the cool pool water taken from one end is heated by the collectors and unloaded as hot with the help of the pipes to the swimming pool.
5.) When the pool is warm enough, the secondary pipe system starts to pour the water to the pool by using the pipes other than the collectors. This means the water comes back to the pool without being heated. The cycle continues in this way.
Above you can see the main working principles of the solar heaters. We need to add that we turn the secondary pipe system off by manually turning the Check Wave unit off.
Installation Details
Before installing a solar swimming pool heater you should make sure you research all your options; otherwise you could encounter not only high costs, but degradation issues as well. Things to consider when researching:
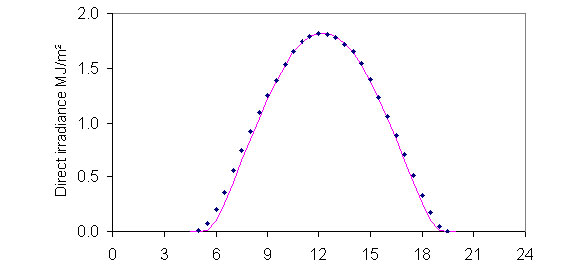
1.) The Sunlight Receiving Capacity of your House: The main principle of the solar collectors is to collect solar energy and heat the water passing through. For this reason the sunlight receiving capacity of the region where your house is situated is really important. In southern regions the insulation time longer than the northern regions. Because of this, you need to define the collector and its capacity according to the region you reside.
2.) The Location of the House: If your house is located in the shadow of a hill or tall building you wouldn't be able to get constant sunlight. This is the reason why the location of the house is very important for the capacity of the system.
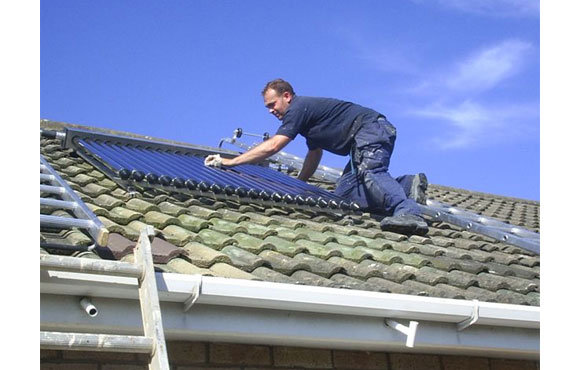
3.) The Location of the Collector: The solar collectors are generally located on the south side of the roof. If not, there will be degradation meaning you are not exploiting all the available solar energy.
Installation of such systems is usually carried out by professionals in the region you live, so the necessary calculations and research will be done by these people.
The capacity of the solar collector is dependent on many variables.
Pool Size: The size and depth of the pool is very important. Since large sized pools are harder to heat, a larger system should be mounted. The preferred calculation is:
Surface area of the pool / the size of the system = 1 or 2, which means the surface area of the collector should be at least the 50% of the surface area of the pool.
Average Temperature: As mentioned above, southern regions usually have higher temperature levels. So the average regional temperature is an important variable.
Pool Temperature: The desired temperature of the pool is a factor influencing the capacity is the system. For those who prefer a higher temperature, larger sized collectors that heat the pool faster is advised.
Collector Location and Tilt: We mentioned that the installation should be done on the southern side. The solar collectors are generally mounted on roofs. Sometimes they are mounted near the pool (using portable collectors). Wherever they are mounted, the collectors should be located facing south otherwise sunlight exposure would be lower and there will be degradation.
It is very important that the same collectors should face the sun. To take full advantage of the sun they should be installed with a 90 degree angle. For this reason, the panels are also mounted at a 90 degree angle.
Collector Type: Some solar collectors transform more energy as they are made from better quality material and components of a more advanced technology.
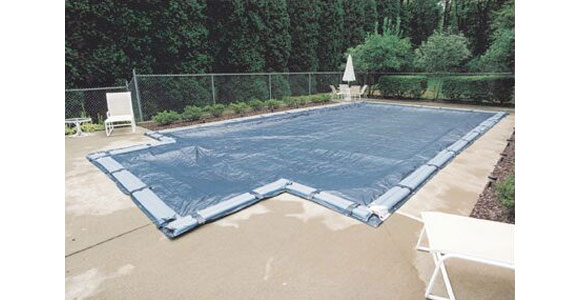
Pool Covers: It is important to install systems for preventing the energy being wasted. Pool covers are therefore an important consideration. These can be used to keep the pool warm.
10–20 % of the energy in swimming pools is lost due to the bottom and side walls. 60-70% of it is lost due to evaporation. In these cases a pool cover prevents much of the evaporation.
The evaporation rate depends on the rate of humidity, the speed of the wind and difference in temperature between the pool and environment. When you choose a pool cover therefore, consider these variables.
Energy Efficiency and Solar Pool Heaters
We have explained the main parts of the solar pool heaters and other things that you should know so far. Now, let's take a look at the performance of the solar collectors and the factors influencing the performance.
The main unit used for the solar collectors is BTU (British thermal unit). BTU = 1 pound (0.454 kg) is needed to raise the heat of the water 1 °F more. It is calculated as 1 BTU = 1055.07 Joules.
The main unit value is BTU/ft2. The higher the BTU value, the more efficient the solar collector is. For example, a solar collector having 18 BTU/ft2 value works more efficiently than a solar collector whose main unit value is 12 BTU/ft2. The advantages highly efficiency provides are:
1.) Using less space (ft2): The highly efficient collectors can absorb the same amount of energy in a smaller place.
2.) Lowering the cost: The collectors, which take up smaller places and heat more quickly, have less operating costs.
3.) Heating more quickly: The collectors with high efficiency heat more quickly in the same space.
Although high efficiency solar collectors are more expensive, they are cheaper to run in the long term.
Advantages and Disadvantages
Advantages
- Heating the pool with less energy
- Causing less damage to the environment by using renewable energy
- A risk free heating method.
Disadvantages
- Costly installation
- Annual maintenance expenses
- The blot on the landscape that the solar collectors cause
Frequently Asked Questions
Question: My pool is 40 ft x 45ft. What capacity should my collector system have?
Answer: The size of the area where solar collector will be mounted is defined by the efficiency of the solar collectors you would use, the insolation conditions of your house and the location of your city. If solar collectors with high or medium efficiency are used by placing them facing south and there are no high buildings and is located in a southern area:
Total pool range = 40 x 45 = 1800 square feet. If we use minimum 50% parameter, the solar collector size you have to use is:
1800 x 0.5 = 900 ft2
Question: How much does Solar Pool Water Heaters cost?
Answer: The average prices range between $2000 - $10000 and may increase according to the size of the pool.
Question: How can I calculate Price/Performance value?
Answer: There should be a note on each solar collector defining how much BTU it can produce. For example, think that each solar collector has = 30.000 BTU and think that you use 8 collectors. The total BTU value is calculated = 30.000 x 8 = 240.000 BTU/day.
If the cost of each panel is $500, 8 panels would be calculated as $4.000. Daily performance value would be Total BTU/Total Price = 240.000/4.000 = 60 BTU/day-dollar, which means you save 60 BTU/day for each day. The higher this rate is, the more advantageous you are.
Question: I would like to get a solar collector system mounted to the pool in my garden. What should I do?
Answer: You should receive quotes from experienced companies in your city. What is important when you choose the company is their experience. You should evaluate references and the terms of guarantee in your region.
Question: How long is the life expectancy of Solar Swimming Pool Heaters?
Answer: An average system has 10-25 years of use, depending on the quality of the collector.
Question: How long will it take to provide a payback?
Answer: The recycling period changes between 1- 8 years and the parts you choose have a great influence on this period.
Question: The region I live has very cold winters with ice and snow. What should I do to protect the system?
Answer: There is a method called Freeze Protection. You should set up a loop system for this system to function. The first cycle is between the collectors and heat transfer box, the second cycle is between the pool and heat transfer box. So the heat transfer occurs in the specially designed heat transfer box. The freezing temperature is lowered by pouring antifreeze to the system in the first cycle. There is no problem in the second system as there is no water.
Question: How can I install Solar Pool Heating?
Answer: You are better leaving the installation to the professionals as mounting on the roof and placing the pipes in the proper fashion, as well as all the calculations, have to be done correctly. A transfer pump is mounted between the collector on the roof and the pool, and the installation is complete after the whole system is connected altogether with the pipes.
Solar Pool Heating systems are widely used today. If you live in an area with high insolation levels, and have no high buildings around your premises, you can contribute to a cleaner environment by using solar power.